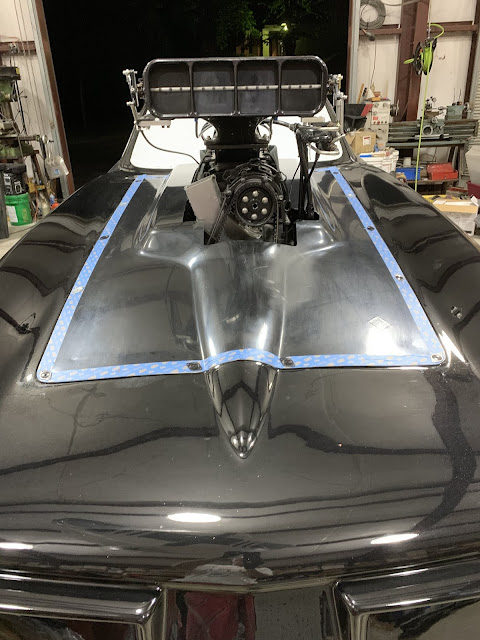
I have had a bunch of people ask how I see out of the windows! That is a protective film on the polycarbonate windows to prevent scratching while I work on the car. The blue tape on the hood is also to protect and mark my holes while I was mounting it. I also have to paint the hood to match the car once I get it finished.
I also spent a whole day getting all of the 4-link rear suspension set up. I have it pretty close now (I thought). I want to have it pretty close before the Janis family helps me test the car this summer. Below is a screen shot of the actual setup in the car now. The screen shot is of the software I use to do 4-link calculations. I tried to achieve a setup that Mike Janis gave as a starting setup. The numbers circled in Red are the goal I was trying to achieve by adjusting all of the settings in the white boxes.
The number on the left represents an imaginary intersection point if you project a line from the top and bottom 4-link bars. This point is called the intersection point or vanishing point. This setup is a fairly long intersection point which slows down the reaction of the suspension during acceleration. Shorter would equal quicker reaction.
The number on the right is the height above the ground for the intersection point. Lower intersection points cause the car to squat on acceleration and transfer weight to the back of the car. Higher intersection points prevent the car from squatting and prevent excessive weight transfer.
There are a million different ways to achieve the settings that Mike wanted me to achieve and I chose one of those methods. Yes, I am a rookie and I chose the wrong one. From the image below, you can see the setting called "Rear Spread" is at 13.5 inches. After reading more last night about different setups, I found out that wide rear spreads should only be used on less powerful cars. That is because a car with less horsepower needs the extra leverage to make the rear end react correctly. A car as powerful as mine should have less spread.
Sure enough, after I sent this screen shot to Mike last night he gently told me that the spread needed to be less than 12 inches. That is why he is the expert.
This process causes me to think and read a lot and try to keep myself from looking stupid (which I am on a car at this level of competition). This process is also how a rookie learns. I would never be content not knowing why something does and does not work.
Now I will move the links inward to reduce the rear spread while adjusting the angles to maintain the length and height of the intersection point. Simple geometry right?
The good news is that I have a baseline setting in the software now and I can simply platy with the numbers in the white boxes until I find a setting that will achieve the results Mike suggested. Once I work it out in the software, I simply move the links where they belong.
Have I said that the Janis family is a blessing lately! I do not know of anyone else that would spend as much time answering my questions without wanting to kill me! Thanks Mikes X2!
I am learning so much throughout this process! Some day I may actually be a race car builder, maintainer, and driver, just maybe!
This is the new setup after Mike told me I needed to make the "Rear Spread" smaller. I think I am close now!!!
Click on the Blog Archive hierarchy on the right hand side to see my posts in order. The ones at the bottom are the newest posts.
Or


No comments:
Post a Comment